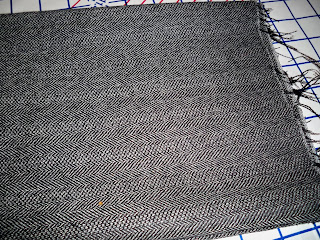
First up for Fall/Winter 2011 is a lovely Jacket with asymmetrical closing & 3/4 length sleeves made out of 100% Wool "Herringbone."
I am using a Simplicity Pattern, bought on Etsy, that I graded up 2". This was awesome practice and it turned out great!
I am making View #2. I got the fabric to make it half price and I really love it, it is so easy to sew with. I think my new favorite fabric to work with is wool.....
I made the muslin and I was really happy with how the fitting turned out! I couldn't believe that my grading worked....I am so proud.
I have been focusing on really doing things thoroughly, instead of taking "shortcuts" that end in mediocre results. Therefore, I have been basting stuff together before permanently attaching the seams, highlighting the center lines with a hand done basting stitch to help with fitting, overcasting to finish seams and to prevent un-raveling....All these little things take a lot of extra time but I think they will pay off in better results.
At this point I am very close to finishing the outer shell.....I have finished the construction and the major "tailoring" details that I taught myself with this project. Again, very proud.
I used Hair Canvas for support and structure at the front and back as well as in the sleeve and body hems, I really like the result of this. I also "taped" along the neckline, front closing and armholes for extra stability. This detail has really created a crisp, solid look on the neckline and closing, like you see in men's suits. I have learned so much about what goes in to creating a tailored look and it has been really fun researching it and practicing. I can't wait to make more tailored clothing.
My resources have been The New Encyclopedia of Modern Sewing (ca. 1940's), the standard Vogue sewing book and the awesome internet.
My next steps are finishing the interior seams to prevent the inside from raveling too much, constructing the lining and inserting it and then attaching the sleeves, which I will do after I insert the lining. I may not use buttons and instead use snaps on the inside for closure. I want to keep the finish as clean as possible.


